Layer blending modes are a key part of the Photoshop program. When you have more than 1 layer, than you can blend the layers together. The blending modes are broken into 6 main areas. 1). Basic, 2). Darken, 3). Lighten, 4). Contrast, 5). Comparative, and 6). Composite. Instead of this being a tutorial, this is going to be more of a reference guide. Keep our website as a favorite and refer back to this document whenever you are trying to blend layers.
Currently we are using Windows Vista Home Premium 64 Bit and the Photoshop CS4 Extended 64 Bit version.
Preparing For This Tutorial:
You will be using a PSD file that has 3 (gradient, a light photo, a dark photo). If you do not have this image, please scroll down to the image of “Click Picture To Download Supporting Files” and download the picture. Please open the image PE-BLENDING.PSD in the Photoshop Program.
General Information:
We thought about when we were going to give this tutorial. Some people may feel this reference guide is too advanced for a beginner/intermediate site. The problem is that up and coming tutorials we will be using some of these blending modes. Also in the High Pass Sharpening tutorial, we showed you 5 different blending modes and did not explain why we were using those specific blending modes. We feel that if we give you this reference guide now, you will begin to gradually learn the blending modes.
**It is very important to understand that some of these blending modes may not make any sense to you right now, but as you progress with learning Photoshop on our website, you will learn more techniques to use these layer blending modes. For now we just want you to understand how to use a layer blending mode and to show you some examples of the modes.
You will notice that there is no 10 question quiz at the end of this reference guide. That is because learning and understanding the layer blending modes will take you sometime. Even advanced Photoshop users still refer to these guides (we do!). Our goal in this document is to show you how to use the blending modes and what each blending mode does and show you some results with blending 2 layers together.
How To Use This Guide:
When you open the document, you will have 3 layers. Make sure the top layer in the layers palette is the Gradient. Blending modes usually react differently on lighter and darker areas. You will notice this gradient has a light and dark side to the image. Then you will notice 2 additional layers. 1). Dark Photo and 2). Light Photo. We wanted to show you the results when you are blending into a darker versus a lighter photo.
If you are using an older version of Photoshop CS4, you may not have all of these blending modes. The examples were used with 100% opacity, unless otherwise noted.
To follow along with this tutorial, you will be using the “Eye” in the layers palette to hide either the light or dark photo layers. You will always have the blue gradient layer on top and it will always be visible. When you are adjusting the blending mode, you will always be working on the Gradient layer (top layer).
**In this guide we sometimes call the top layer the “Blend Color” and the bottom layer the “Base Color”. The reason why we called it differently in this document is because some websites may only use the actual terms instead of the top or bottom layer. It is important to understand that when these websites are talking about the “Blend Color”, the site is talking about the top layer and when they say “Base Color”, then that means the website is talking about the bottom layer. So what should you use if you are speaking to others about blending modes? It does not matter, but we use the base/blend terms.
Sample Images:
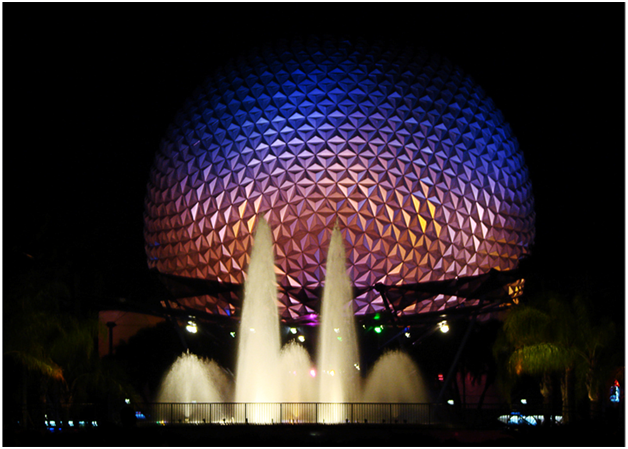
Here are the 3 sample images we are going to be using. This first image is the gradient layer (top layer or known as the blend color). As you can see it is light on the left hand side and darker on the right side.
Here is the image that we will be using for the light photo. For this guide, this will be the bottom layer or the base color. As you can see the clouds and the castle are light colors. Remember the gradient layer will be blending into this image.

Here is the image that we will be using for the dark photo. For this guide, this will be the bottom layer or the base color. As you can see the sky and most of the image is dark. Remember the gradient layer will be blending into this image.
Using Blending Modes:
As long as you have 2 layers, you can use any of these blending modes.
| A). Left click the top layer (base color) that you want to blend from. In this example it will be the Gradient layer. | |
| B). Left click the drop down box to display all of the blending modes. | |
| C). To reduce the blending, use the Opacity option. |

If you Left clicked B) from above, you will see a list similar to the one below. The menu is broken up into 6 different sections. 1). Basics, 2). Darken, 3). Lighten, 4). Contrast, 5). Comparative and 6). Composite.
To use any blending mode, just Left click on the blending mode name.

Blending Sections:
As you can see the blending modes are grouped into sections. Let’s explain what you will find in each section.
Basic Section:
You will find the Normal and Dissolve blending modes in this group. As the name states, these are your basic blending modes. You will usually have to change the opacity for these blending modes to bleed through to the layer below.
Darken Section:
The darken blending group contains 5 different modes (Darken, Multiply, Color Burn, Linear Burn, and Darker Color). In this group a white color will make no change to the image and lighter colors will produce a less effect than a darker color.
Lighten Section:
The lighten blending group contains 5 different modes (Lighten, Screen, Color Dodge, Linear Dodge, and Lighter Color). Each of these lighten blend modes will give you an effect to lighten the image. You will find a black color will make no changes in the image.
Contrast Section:
The contrast section is made up of 7 different blending modes (Overlay, Soft Light, Hard Light, Vivid Light, Linear Light, Pin Light and Hard Mix). These blending modes will darken and lighten certain parts of the image by changing the contrast.
Comparative Section:
The comparative group is made up of the Difference and Exclusion blending modes. These two blending modes compare the two layers. It looks for areas that are identical in both layers.
Composite Section (previously known as HSL):
You will find the Hue, Saturation, Color and Luminosity blending modes in this group. These blending modes will affect either the luminosity or color of the image.
Basics Section:
Normal:
**On this example, we used 50% opacity on the gradient layer.
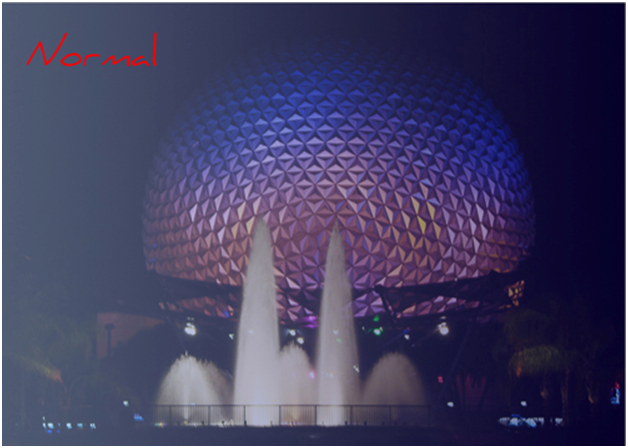
This is the default mode and displays every pixel in the active layer. It does not take in account for colors, shades, etc. If the opacity is set to 100% and there are no transparent parts of the image, then you will see no change and only the top layer will be displayed.

**On this example, we used 50% opacity on the gradient layer.
Dissolve:
**On this example, we used 50% opacity on the gradient layer.
Dissolve removes random pixels from the image. Dissolve only affects images with semi-transparent pixels. The final result of the Dissolve is a jagged or fuzzy effect and will dissolve on feathered or softened edges. Because no anti-aliasing is used in this blend mode, you will find most of the time the images will end up looking grainy.

**On this example, we used 50% opacity on the gradient layer.

Darken Section:
Darken:
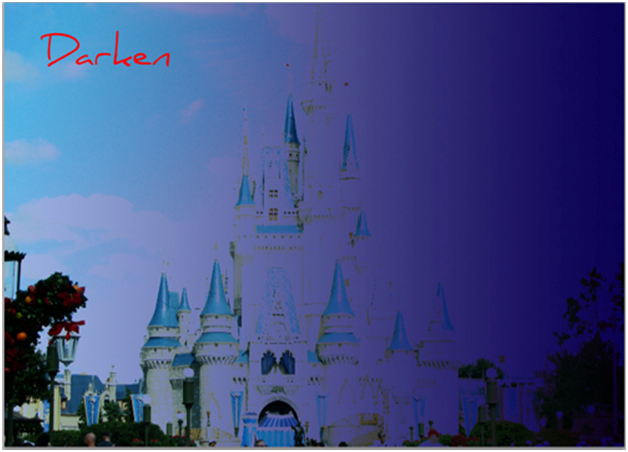
The Darken blend mode looks at the color information and determines the darker areas of the layers. The lighter pixels only in the underlying layer are than replaced with darker pixels. So for a 1 sentence explanation, the Darken blending mode takes the darkest value for each pixel from each layer and then darkens the lighter pixels.

Multiply:
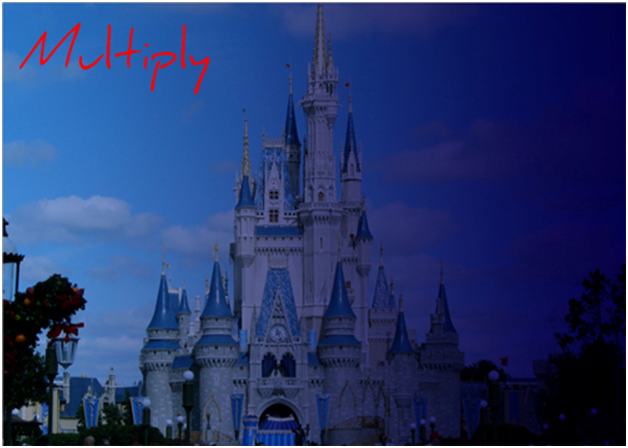
Photoshop looks at the color of the bottom layer of the 2 layers and multiples that color with the top layer color. The end result is an overall darker image. If the top layer is white, than there will be no change to the image. If you multiply any color with black, it will produce a black result.

Color Burn:
Color Burn looks at each channel and darkens the base color to reflect the blend color by increasing the contrast. The darker the bottom layer is then the more its color is used. If you are blending with white, you will so no difference.


Linear Burn:
This very complex blend mode looks at the color information in each channel and darkens the blend color by decreasing the brightness (not contrast). When the bottom layer is darker, the more it uses the colors. If you try to blend with a white, it produces no difference.


Darker Color:
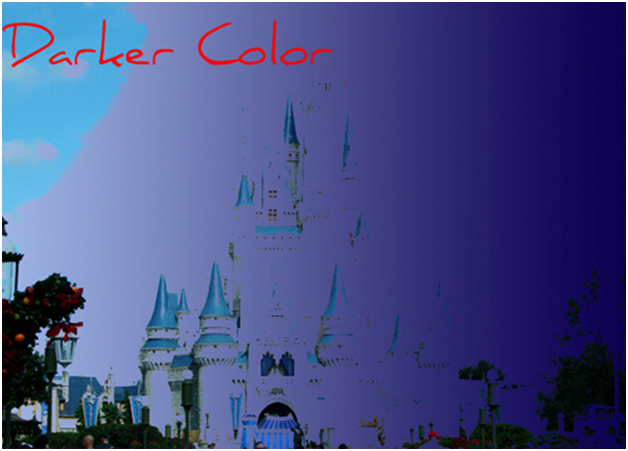
This blending mode is found in Photoshop CS3 and CS4. This is very similar to the Darken mode, except that Photoshop compares the total of ALL channel values for the blend and base color and displays the color that is the lower value. When you blend 2 layers together, only the darker pixels on the blend layer remain visible.

Lighten Section:
Lighten:
The Lighten blending mode is the opposite of the Darken mode. It compares the brightness levels and replaces the pixels that are darker with lighter pixels. Any pixels that are lighter than the blend color will not change.


Screen:
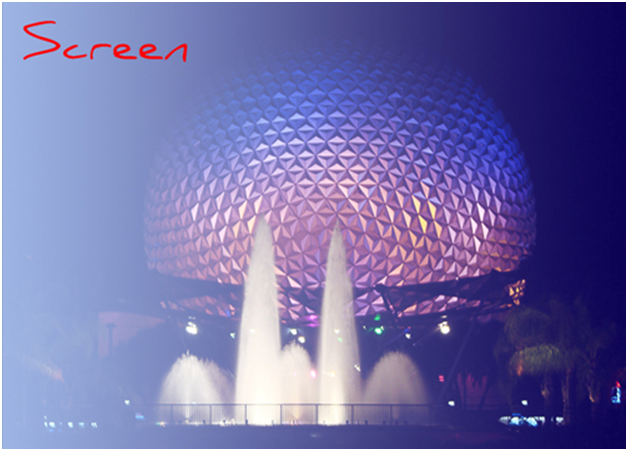
The Screen blending mode is similar to the Multiply mode, except it uses the inverse values to display the final image. The final result is the color ends up to be a lighter color. When you are screening with black it leave s the color unchanged. When you use the Screen mode with white, it produces white. The Screen mode can be useful when you want to retain just the lights colors in a gradient or creating glows.

Color Dodge:
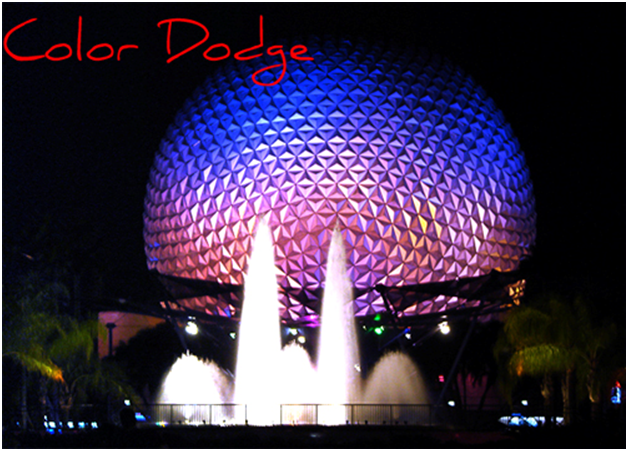
The Color Dodge blending mode decreases the contrast to make the bottom layer match the top layer. If the top layer is bright, than the more the colors are affected by the bottom layer. When you try to blend the top layer that is all black, it will produce no changes to the bottom layer.

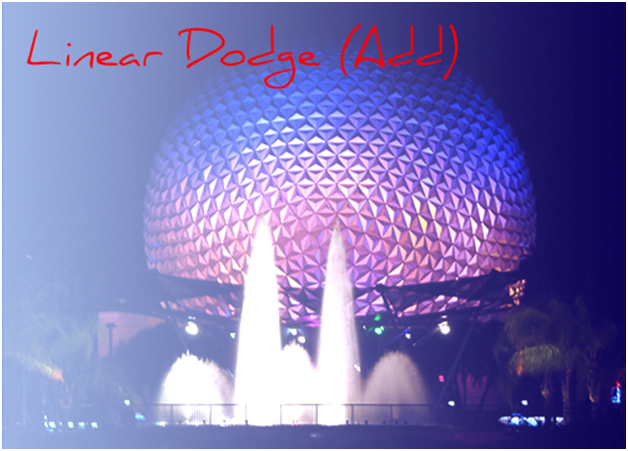
Linear Dodge (Add):
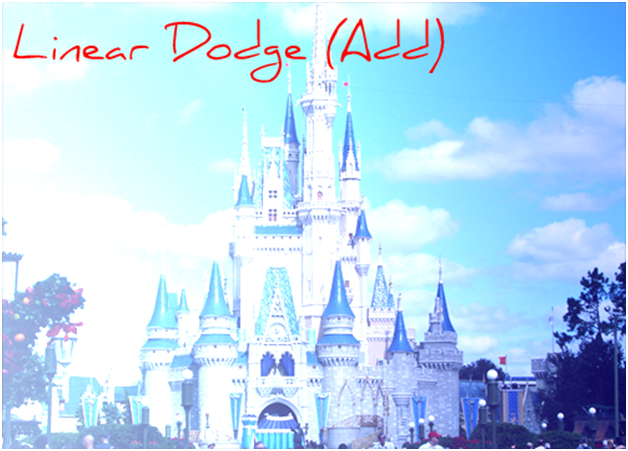
This complex blending mode will look at the color information in each channel and brightens the base color to reflect the blend color by increasing the brightness. When you are blending with black it produces no change.
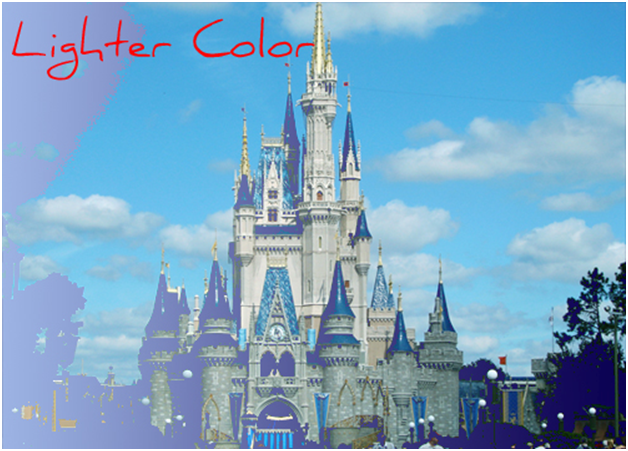
Lighter Color:
The Lighter Color blending mode compares the total of ALL the channel values for the blend and base color and displays the higher value color. It chooses the highest channel values from both the base and blend color to create the final color.

Contrast Section:
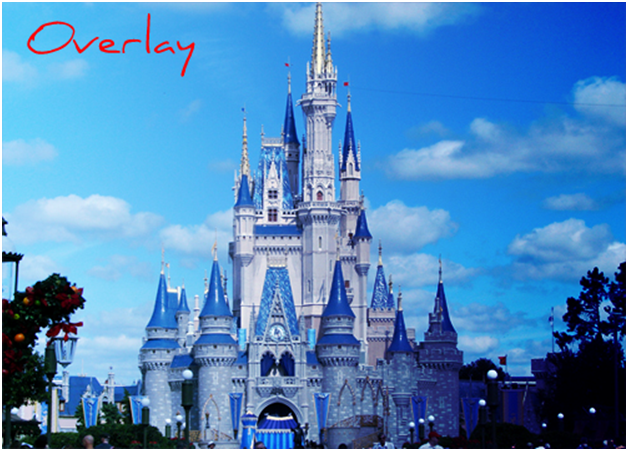
Overlay:
The Overlay is a very useful blending mode. The base color is not replaced, but it mixes the colors of the top and bottom layers, but maintains the highlights of the layers. The Overlay will Multiply or Screen the colors, depending on the base color.

Soft Light:
Depending on the blend color the soft light may darken or lighten the colors. Soft Light tries to determine if the top layers are closer to the black or white colors and either lightens or darkens the colors accordingly. If it determines it is lighter than a 50% gray, the image is lightened. If the value is darker than a 50% gray, then the image is darkened. So if the layer has pure white or pure black, you will see either a much darker or lighter areas.


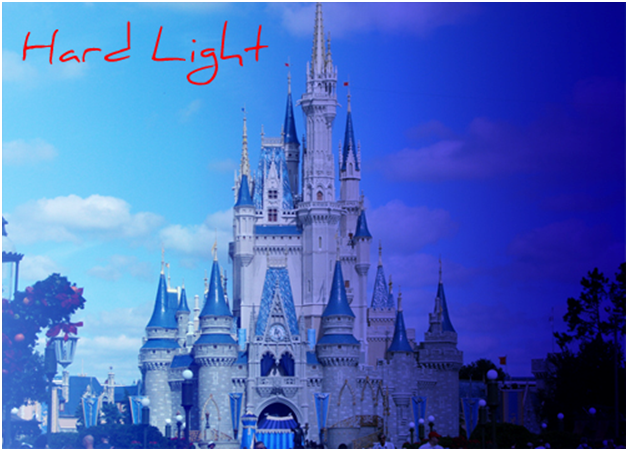
Hard Light:
The Hard Light is similar to the Overlay blending mode, but the change is more dramatic. As opposed to Overlay, the contrast is also increased. The hard light combines the Multiply and Screen blend modes. If the blend is darker than 50% gray, the image is darkened as if it was using the Multiply blending mode. If the light source is lighter than 50% gray, then the image is lightened as if it was using the Screen blending mode.

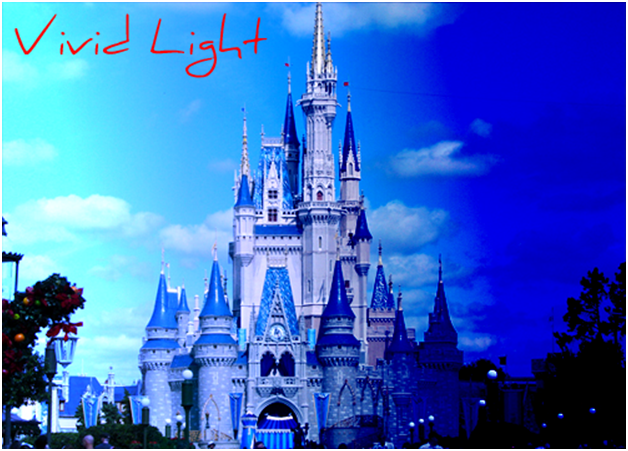
Vivid Light:
Vivid Light combines the effects of both the Color Burn and the Color Dodge blending modes. It first determines if the light source is lighter than 50% gray and if it is, it decreases the contrast. If the blend color is darker than 50% gray than the image is darkened by increasing the contrast.

Linear Light:
You will find the Linear Light is similar to Vivid Light, but it uses brightness to change the colors in the image. The Linear Light increases or decreases the brightness based off the blend color. If the blend color is lighter than 50% gray, the image will be lightened by increasing the brightness. If the blend color is darker than 50% gray, than the image is darkened by decreasing the brightness.


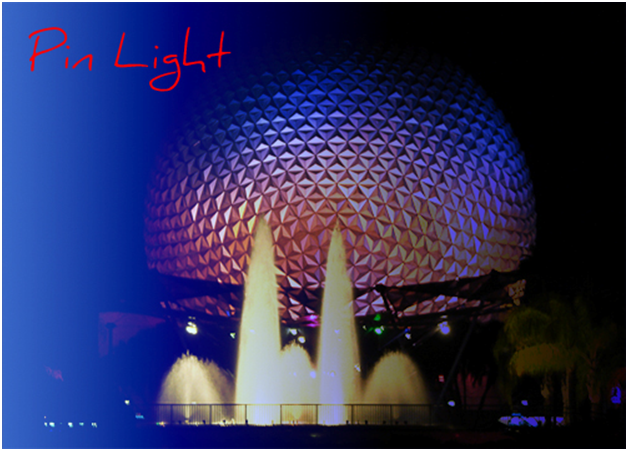
Pin Light:
The Pin Light determines the blend color. If it is lighter than 50% gray, than the darker pixels will be replaced and the lighter pixels will not change. Now if the blend color is darker than 50% gray, the lighter pixels will be changed, but the darker pixels will be untouched. When it blends the light colors in the top layer, it then uses the Lighten mode and blends the dark colors using the Darken mode.

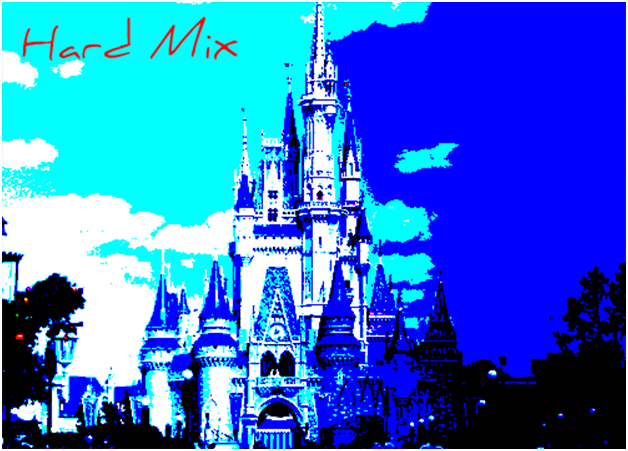
Hard Mix:
It calculates the values of red, green blue in your image. It will then try to change the colors to one of 8 colors (red, green, blue, cyan, yellow, magenta, white or black). It uses the Vivid mode to apply the actual blending. This creates a flat toned picture with limited colors.

Comparative Section:
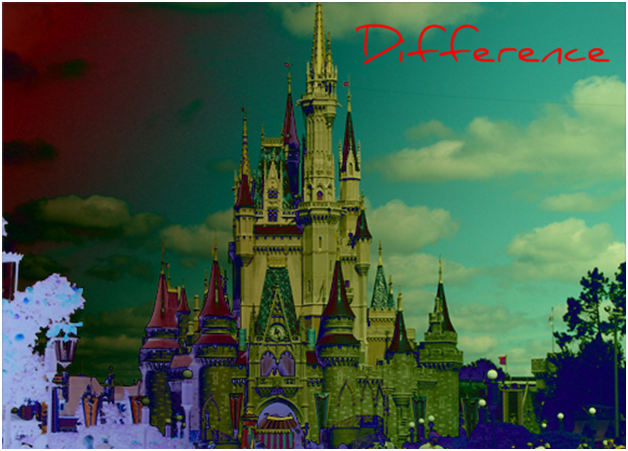
Difference:
This subtracts the top layer from the bottom layer or the other way around (bottom to top) and takes the value that is positive. The Difference blending mode than inverts the lower layers according to the brightness values of the active layer. White inverts the composite pixels absolutely, while black will not be inverted at all. When it uses other brightness values it will invert them to some degree.

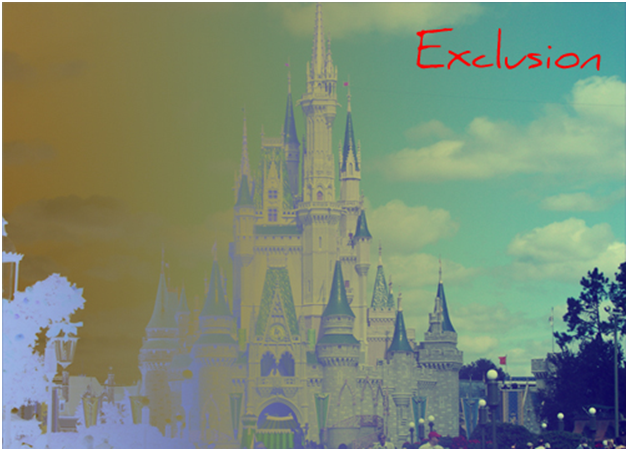
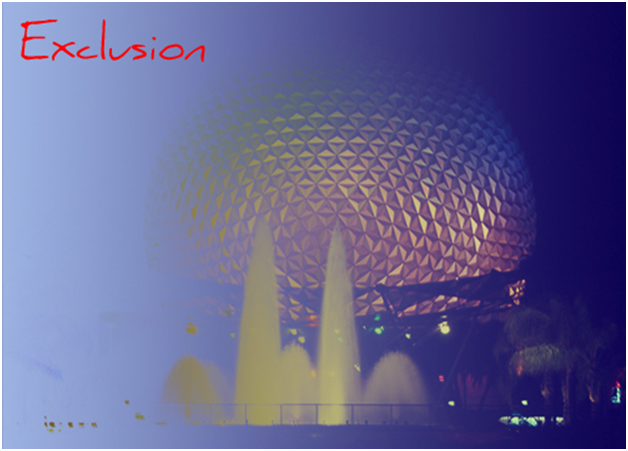
Exclusion:
The Exclusion blending mode is similar to the Difference mode, but is more subtle with the contrast. If it finds mid-tones to gray, it sends mid-tone to a transparent. Blending with white inverts the base color values, while a blending with black makes no changes.
Composite Section:
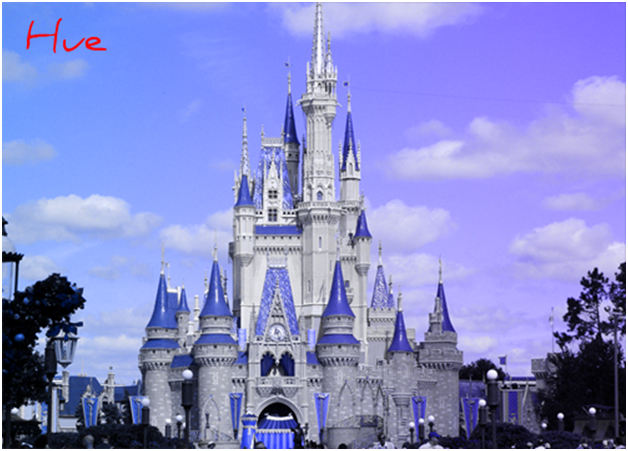
Hue:
The Hue blending mode combines the color of the top layer with the saturation (color vibrancy) and the tones of the bottom layer.

Saturation:
The Saturation combines the saturation (color vibrancy) of the top layer with the Hue (color) and luminance (tones) of the bottom layer.


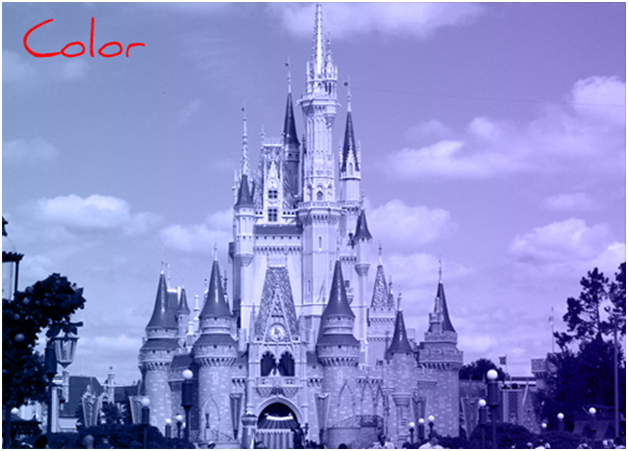
Color:
This creates a final color with the luminance of the base color and the hue and saturation of the blend color. It preserves the grey levels in the image and it is very useful for coloring monochrome images and for tinting color images.

Luminosity:
This combines the Luminance (tones) of the top layer with the Saturation (color vibrancy) and the Hue (color) of the bottom layer. This mode creates the inverse effect of the color mode.


Conclusion:
Remember it is not important to understand the entire layer blending modes list at this time. You will gradually learn them through many up and coming tutorials on our site. You should know by now how to use the blending mode with the 2 layers in the layers palette. We also explained that you can change each effect by adjusting the opacity.
We hope you enjoyed this detailed blending mode reference guide. Please visit us at: http://www.Photoshopeducation.blogspot.com to expand your knowledge within Adobe Photoshop.

Click Picture To Download Video File To View Offline
Download Total Video Player, iTinySoft

Click Picture To Download PDF Tutorial
Download Adobe Reader, Adobe Corporation
Click Picture To Download Supporting Files
(Brushes, Textures, Fonts, Images, Actions, .PSD, Etc.)
Download ZipGenius Standard Edition 6.0.3.1150, Dicono di ZipGenius


"When the bottom layer is darker, the more it uses the colors."
ReplyDeleteClassic
Thanks af.
ReplyDeleteIt is extremely helpful for me. Thank you for taking the time to discuss this,Commercial Real Estate Review. I feel strongly about it and love learning more on this topic. If possible, as you gain expertise, would you mind updating your blog with more information. clipping path
ReplyDeleteThanks for taking the time to discuss layer blending, I feel strongly about it and love learning more on this topic. If possible, as you gain expertise, would you mind updating your blog with more information? It is extremely helpful for me. Online clipping path service
ReplyDeleteThis comment has been removed by the author.
ReplyDeleteReally nice and helpful post thanks for sharing with us .
ReplyDeleteclipping path service
If you want to learn about Graphics Design, open-tutor.com is the best platform for you. It provides online graphic design, Photoshop Tutorial, Adobe Photoshop and Illustrator Tutorials for beat career building. Open-tutor.com also offer latest update of Jobs Circular in Bangladesh. Visit open-tutor.com for more details and updates.
ReplyDeleteI have visited many of blogs.And found many good Knowledge.This site is one of those site. Thanks for your wonderful post.clipping path/clipping path service
ReplyDeleteThis comment has been removed by the author.
ReplyDelete